
Sony MXP-3036 Re-lamping Project
Last summer (July, 2016) I wired in a pre-owned Sony analog mixer for Howl Street Studios.
At that time, Shane the owner/engineer, queried me as to how might I replace the non working lamps in all the meters in the meter bridge.
After a bit of research I found that although the lamps were still available they did not last very long and it was suggested that using LED’s were the way to go.
Okay, interesting. But not now Shane said.
Fast forward to March of 2017 and Howl Street moved to a new location. After the re-wire and getting all audio flowing good again, Shane brought up the subject again. This time he was “ready” to make that happen. How much? he asked.
I answered, “I really don’t know”. And that sent me on a quest to figure out how and what it would take to re-wire/mod 36 channel meters plus 4 master meters with new lighting.
A look in the service manual, that fortunately Shane got with the Mixer, revealed that the lamps worked on 24v dc. Ok, not bad. But I knew that led’s worked at 2-3 volts so a resister would need to be incorporated into the design somehow.
What color Shane? He wasn’t sure. So, I put together several different colors of led’s on a temporary circuit board to show him. It was at this time I found that a 1 watt 3.9k resistor was what was needed to get the resulting light output for the led. I did try a 1/2 watt resistor but it got pretty warm with the needed drop in voltage.
I showed Shane white, off white, yellow, red and blue led’s. He really liked the yellow as it gave off a real nice vintage glow.
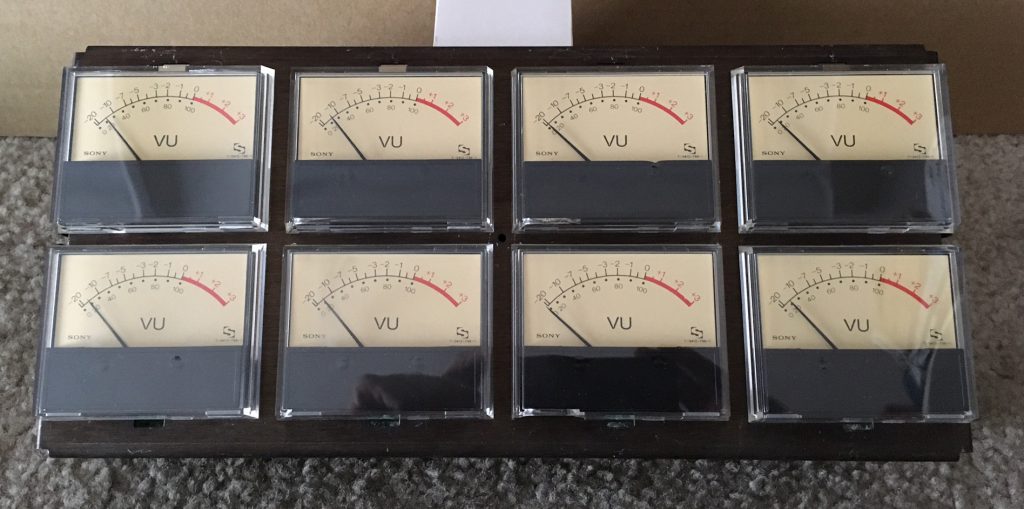
Did I mention that the lamps are part of the meter itself and there is little extra room for anything else? So, I bought 3mm size led’s and resistors off eBay and removed a cluster of meters to start the work and give Shane an accurate price quote.
Here is a cluster of the analog meters removed from the meter bridge.
Here is a close up of the inside of the front part of the meter.
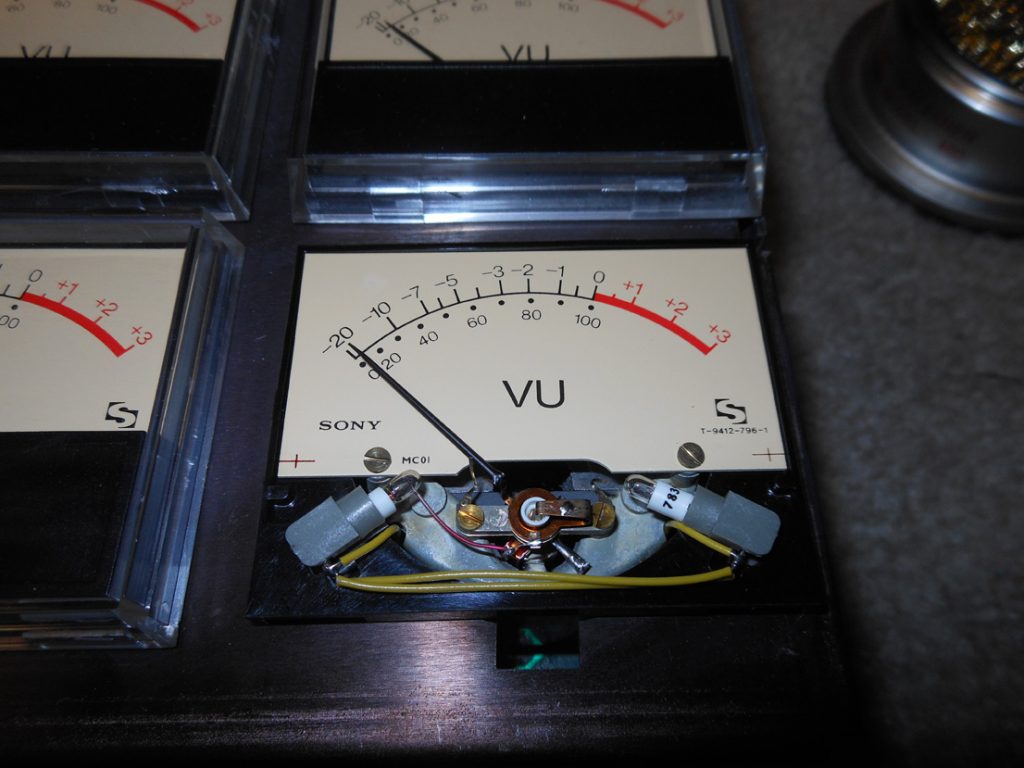
It just so happened that a 3mm led fits exactly into the lamp socket of the original incandescent lamp. Also in looking for yellow led’s I found some that were diffuse. Wonderful, perfect for this application.
The current wiring configuration is such that the lamps are wired in parallel. I need to wire the led’s in series as they are polarity sensitive. And fit a 1w resistor in there somehow. After a bit of different ways of putting all this together I came up with the following scenario.
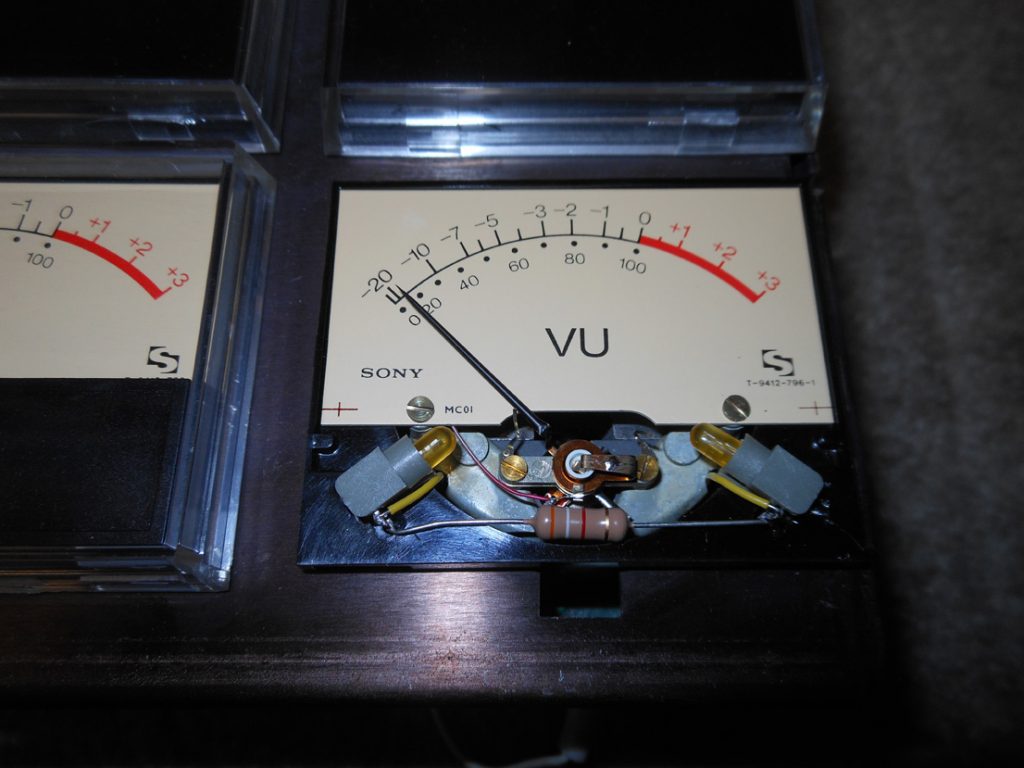
The + side of the voltage comes in thru the right led and passes thru the resistor through the left led to voltage -. This works very well other than if one of the led’s fail there is no light at all. A minor detail. Led’s last a very long time and generate pretty much no heat.
I did the first 8 meters and mounted them in the meter bridge and Shane was very excited. A very nice vintage look.
Here is an image of the 8 meters all lit up.
